Bulk operations (Mass operations)
Info
For small and medium data volumes. Use for synchronous processing within a single transaction when the data size is up to 10,000 rows.
Bulk operations are a mechanism that allows the user to perform a single action on a large number of table rows at once. Instead of processing each row individually, the user can select a set of data and apply a common operation to it—such as updating, deleting, changing statuses, recalculating values, and other typical scenarios.
This function is available for widgets:
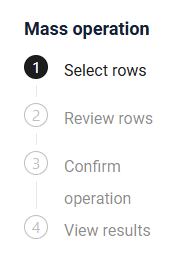
When the table contains at least one row, bulk operations become available. After clicking on a bulk operation, the user enters the bulk-operation mode, which consists of several steps:
- Selecting rows
- Reviewing the selected rows
- Confirming the action (this step is optional)
- Viewing the result
How does it look?
Specifics
- Bulk operations become available only if there is at least one row in the table.
- All requests are executed using the ID of the first selected row!
How to add?
Example
-
Step1 Add actionGroups massEdit(Custom name) to corresponding .widget.json.
{ "name": "myexampleList", "title": "List", "type": "List", "bc": "myexample", "fields": [ { "title": "Id", "key": "id", "type": "input" }, { "title": "Custom Field Checkbox", "key": "customFieldCheckbox", "type": "checkbox" }, { "title": "Custom Field Dictionary", "key": "customFieldDictionary", "type": "dictionary" }, { "title": "customField", "key": "customField", "type": "input" } ], "options": { "additional": { "fields": [ "customFieldCheckbox", "customFieldDictionary" ], "enabled": true }, "massOp": { "pickMapFieldKey": "id" }, "actionGroups": { "include": [ "massEdit", "save" ] } } } -
Step2 Create action massEdit to corresponding AwareResponseService.
=== "With plugin(recommended)" Step 1 Download plugin download Intellij Plugin**Step 2** Add existing field to an existing form widget Property: -.action(act -> act .action("massEdit", "Mass Edit") .withPreAction(PreAction.confirmWithWidget("myexampleForm", cfw -> cfw)) .scope(ActionScope.MASS) .massInvoker((bc, data, ids) -> { var massResult = getMassDTO(data, ids, false); return new MassActionResultDTO<MyExampleDTO>(massResult) .setAction(PostAction.showMessage(MessageType.INFO, "The fields mass operation was completed!")); }) ).action("massEditCustomTitle", "Mass Edit With Custom Text")* `"massEditCustomTitle"` — name button for internal used by backend and frontend. * `"Mass Edit With Custom Text"` — title displayed in the UI.-
.withPreAction(PreAction.confirmWithWidget(...))Adds a confirmation dialog before the mass action executes.
Parameters:
-
1) The name widget used for the confirmation .
-
2)
cfw -> ...:
A configuration block where properties are defined:
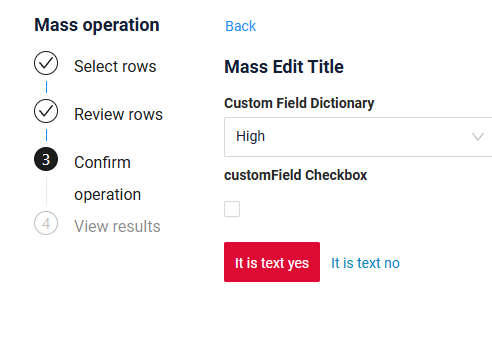
**`.noText("It is text no")`** Text for the **Cancel ** button. **`.title("Mass Edit Title")`** Title of the a confirmation dialog before the mass action executes. **`.yesText("It is text yes")`** Text for the **Apply** button.This allows customizing the buttons and title.
-
-
.scope(ActionScope.MASS)**Specifies that this is a mass action, applied to all selected rows in the grid.
-
.massInvoker((bc, data, ids) -> { ... })The main handler for the mass operation.
Parameters:
bc— business component context.data— data submitted from the confirmation dialog based on the first row.ids— the set of IDs of all selected records.
Inside the handler: The method processes each record and returns:
MassDTO.success(id)- result successMassDTO.fail(id, "message")- result error
-
return new MassActionResultDTO<>(massResult)...**The mass action result includes:
- success/failure information for each record,
- a UI post-action.
-
.setAction(PostAction.showMessage(...))Displays a message in the UI after the mass action completes.
Parameters:
MessageType.INFO— message type."The fields mass operation was completed!"— message text.
.action(act -> act .action("massEdit", "Mass Edit") .withPreAction(PreAction.confirmWithWidget("myexampleForm", cfw -> cfw)) .scope(ActionScope.MASS) .massInvoker((bc, data, ids) -> { var massResult = getMassDTO(data, ids, false); return new MassActionResultDTO<MyExampleDTO>(massResult) .setAction(PostAction.showMessage(MessageType.INFO, "The fields mass operation was completed!")); }) ).action(act -> act .action("massCheckboxTrue", "Mass Set Checkbox true") .scope(ActionScope.MASS) .massInvoker((bc, data, ids) -> { var massResult = getMassDTO(data, ids, true); return new MassActionResultDTO<MyExampleDTO>(massResult) .setAction(PostAction.showMessage(MessageType.INFO, "The fields mass operation was completed!")); }) ) -
Step 1. Selecting rows
How does it look?
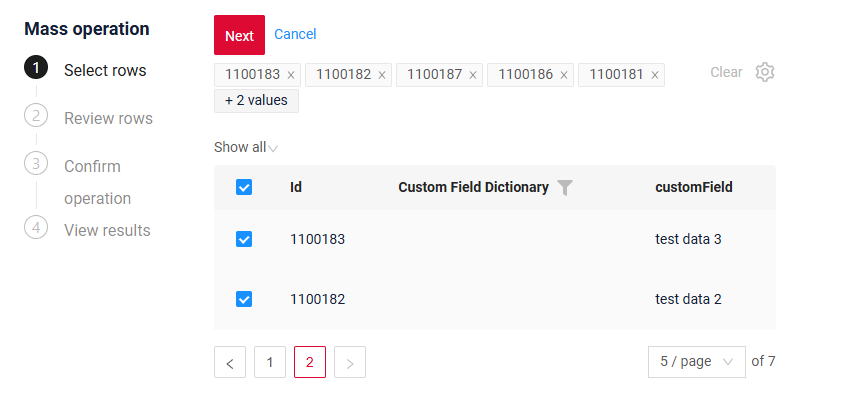
- Checkboxes for selecting rows are displayed in the first column of the table (true = the row is selected).
- Filtering and sorting remain available.
- Rows become non-editable while in bulk-operation mode.
-
All selected rows are displayed above the table as chips.
- If the number of chips exceeds N, only the first N are shown; the rest are collapsed and replaced with the label “+N values”. Hovering over “+N values” displays a tooltip: “Move on to Step 2 to see all the chosen rows.”
- A “Clear” button is displayed next to the chips. Clicking Clear deselects all checkboxes and removes all chips.
- A gear icon is available for chip-related actions, containing the option “Select from file” (importing data from an Excel file step 4).

-
Available actions:
- Cancel — exits bulk-operation mode.
- Next — proceeds to Step 2, where only the selected rows are displayed.
Step 2. Reviewing the selected rows
How does it look?
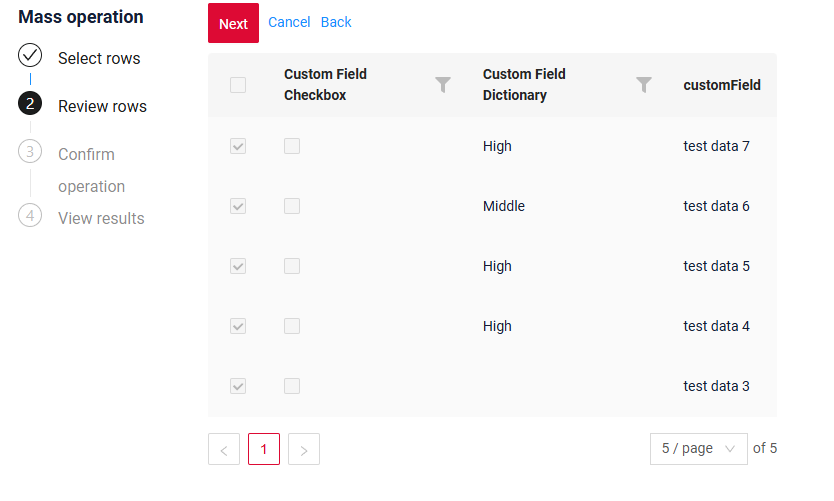
1.Selected rows from Step 1. Selecting rows are displayed in read-only mode.
2.Checkboxes are disabled, and rows cannot be edited.
3.Filtering and sorting of the selected rows remain available.
4.Available actions:
4.1.Dynamic “Next / Apply button
- Next — moves the user to Step 3 (confirmation).
- Apply — immediately executes the bulk action and navigates to the View Results step.
4.2.Back — returns the user to Step 1 (row selection). When returning to Step 1, the table resets to the first page and all filters are cleared.
4.3.Cancel — exits bulk-operation mode without applying any changes.
Step 3. Confirming the action
How does it look?
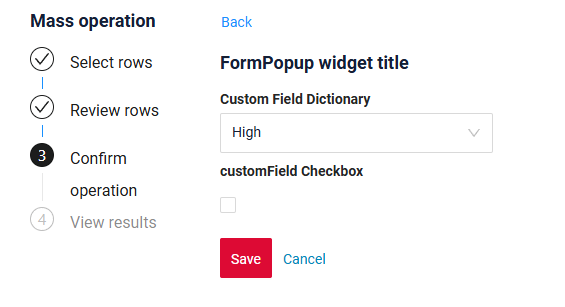
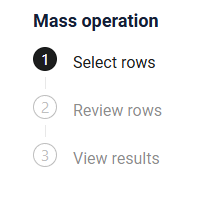
You can enable or disable the confirmation step — if it’s disabled, the system moves directly to the View results stage.
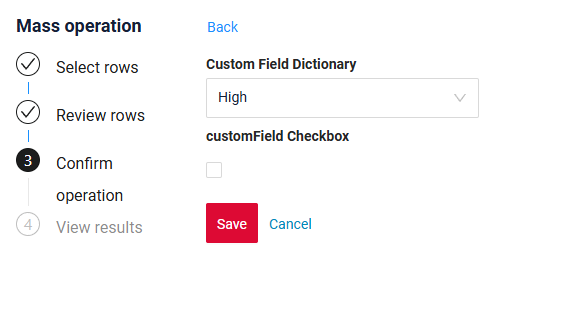
In the confirmation step, you can customize
- the widget’s title
- remove widget’s title
- customize the text of the Save and Cancel buttons
- the Back button is fixed and does not depend on the configuration
How to add?
Example
               .action(act -> act
                       .action("massEdit", "Mass Edit")
                       .withPreAction(PreAction.confirmWithWidget("myexampleForm",
                               cfw -> cfw))
                       .scope(ActionScope.MASS)
                       .massInvoker((bc, data, ids) -> {
                           var massResult = getMassDTO(data, ids, false);
                           return new MassActionResultDTO<MyExampleDTO>(massResult)
                                   .setAction(PostAction.showMessage(MessageType.INFO, "The fields mass operation was completed!"));
                       })
               )
                .action(act -> act
                        .action("massEditCustomTitle", "Mass Edit With Custom Text")
                        .withPreAction(PreAction.confirmWithWidget("myexampleForm",
                                cfw -> cfw.noText("It is text no")
                                        .title("Mass Edit Title")
                                        .yesText("It is text yes")))
                        .scope(ActionScope.MASS)
                        .massInvoker((bc, data, ids) -> {
                            var massResult = getMassDTO(data, ids, false);
                            return new MassActionResultDTO<MyExampleDTO>(massResult)
                                    .setAction(PostAction.showMessage(MessageType.INFO, "The fields mass operation was completed!"));
                        })
                )
                .action(act -> act
                        .action("massEditWithoutTitle", "Mass Edit Without Custom Text")
                        .withPreAction(PreAction.confirmWithWidget("myexampleForm",
                                cfw -> cfw.withoutTitle()))
                        .scope(ActionScope.MASS)
                        .massInvoker((bc, data, ids) -> {
                            var massResult = getMassDTO(data, ids, false);
                            return new MassActionResultDTO<MyExampleDTO>(massResult)
                                    .setAction(PostAction.showMessage(MessageType.INFO, "The fields mass operation was completed!"));
                        })
                )
Step 4. Viewing the result
How does it look?
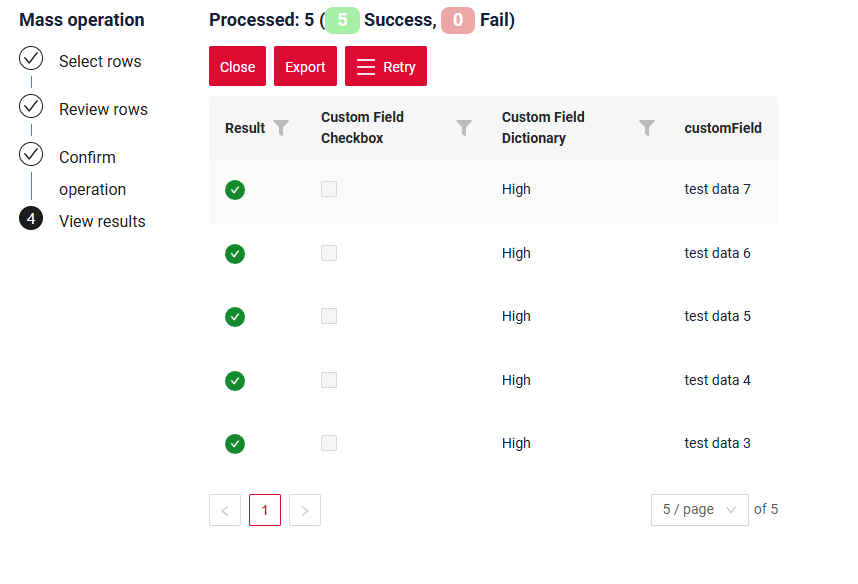
After performing a mass operation, the status for each row in the table is displayed:
- Success – the operation was completed successfully
- Fail – the operation was not completed
The widget header on displays the number of processed rows (including the number of successful/failed rows).
Filtering/sorting of selected rows is available for any column, including status.
Available actions:
-
Save and Close – Exit the mass operation mode. The user returns to the normal table view, taking into account all changes made by the operation.
-
Export – Export rows to a file. 2.1 Ability to filter/sort the table before export. 2.2 File format fully compatible with uploading on Step 1 (Select from File). 2.3 Tooltip on hover: “Export of selected rows. You can use this file on Step 1 via ‘Select from File.’” 2.4 After export, display a notification: "File exported successfully"
-
Export failed (for Retry) – Export all rows with the status “Fail” 3.1 The table is automatically filtered by failed rows. 3.2 File format fully compatible with uploading on Step 1 (Select from File). 3.3 Tooltip on hover: A file with failed rows will be downloaded. To retry the operation for these rows, upload this file on Step 1 via ‘Select from File.’”
Delete
Bulk record deletion can be performed. Successfully deleted records will no longer appear in the step results.
How does it look?
How to add?
Example
                .action(act -> act
                        .action("massDelete", "Mass Delete")
                        .scope(ActionScope.MASS)
                        .massInvoker((bc, data, ids) -> {
                            var massResult = ids.stream()
                                    .map(id -> {
                                        try {
                                            MyEntity myEntityBD = repository.findById(Long.parseLong(id)).orElseThrow();
                                            if (myEntityBD.getCustomFieldDictionary() != null

                                                    && Objects.equals(myEntityBD.getCustomFieldDictionary().getValue(), CustomFieldDictionaryEnum.ERROR.getValue())) {
                                                return MassDTO.fail(id, "cannot delete Error");
                                            }
                                            MyEntity myEntity = repository.getReferenceById(Long.parseLong(id));
                                            repository.delete(myEntity);
                                            return MassDTO.success(id);
                                        } catch (Exception e) {
                                            return MassDTO.fail(id, "cannot delete");
                                        }
                                    })
                                    .collect(Collectors.toSet());
                            return new MassActionResultDTO<MyExampleDTO>(massResult)
                                    .setAction(PostAction.showMessage(MessageType.INFO, "The fields mass operation was completed!"));
                        })
                )